Plastering vs MEP Work: The Correct Construction Sequence
One of the most common and costly mistakes on a construction site is getting the building finishing stages wrong. This guide clarifies the correct sequence for plastering vs MEP work to prevent rework, save money, and keep your project on schedule.
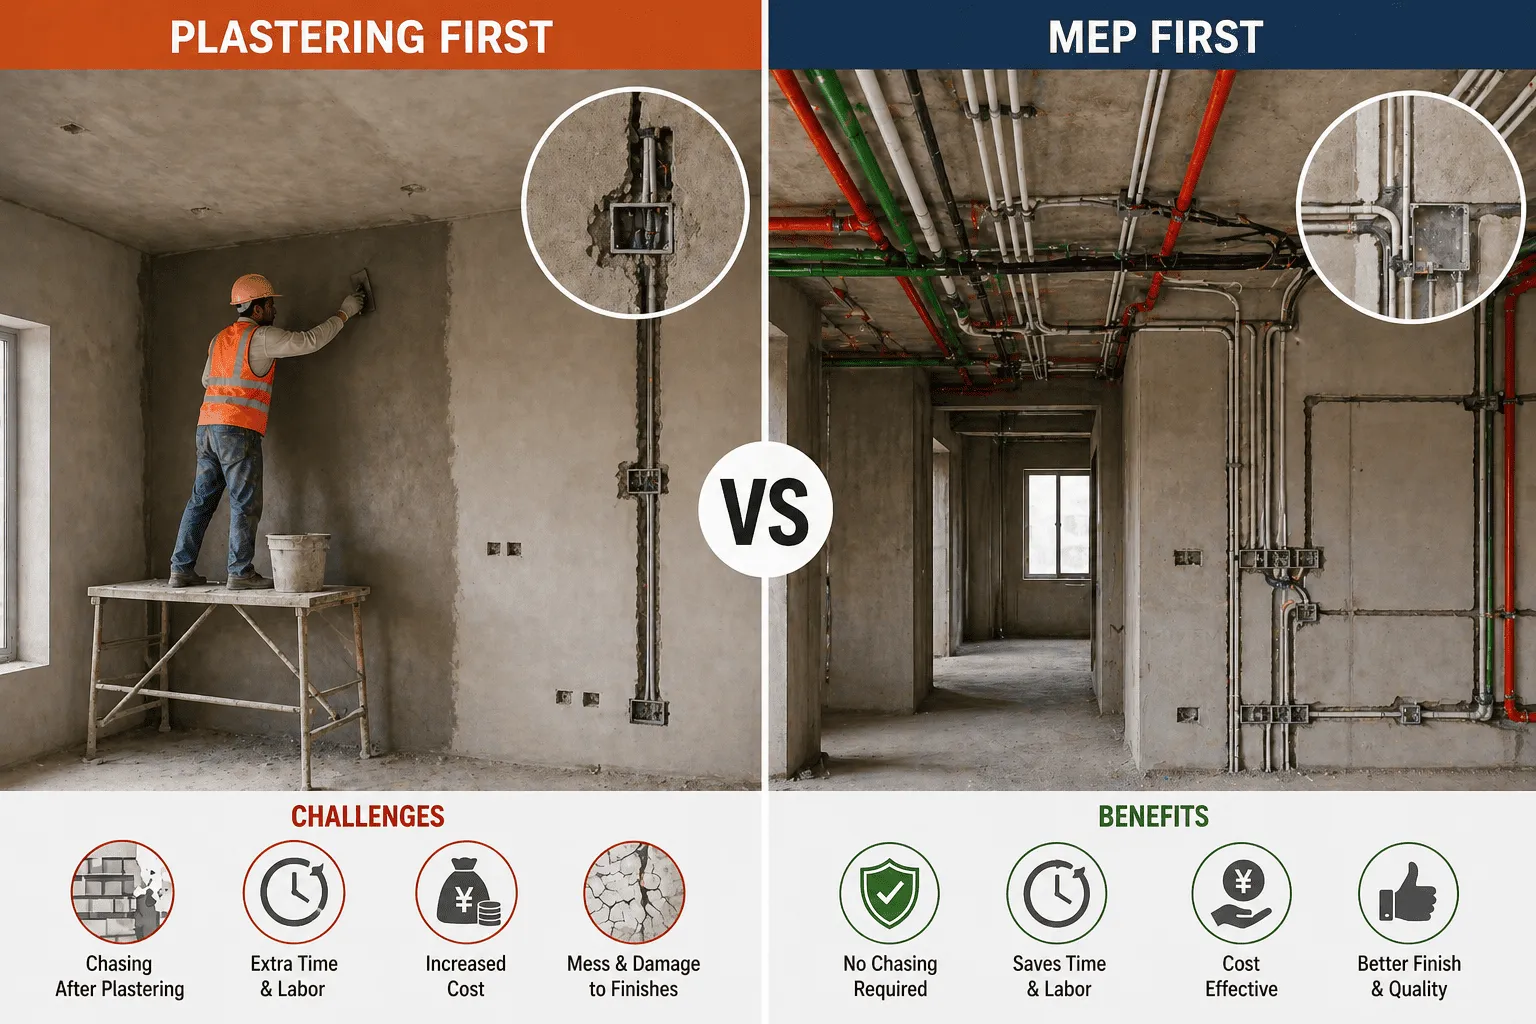
Walk onto any construction site struggling with its schedule, and you’ll likely see the evidence of poor sequencing. One of the most glaring examples? A freshly plastered wall being broken open with a chipping hammer because an electrical socket was missed. It’s a frustrating, costly, and entirely avoidable mistake.
The debate over plastering vs MEP work isn't really a debate among experienced professionals—it's a fundamental rule of the construction sequence. Getting it wrong leads to rework, budget overruns, and friction between your civil and MEP teams. Getting it right is a hallmark of a well-managed project.
This guide breaks down the correct process from a site execution perspective, explaining why the sequence matters and how to coordinate it effectively to ensure a smooth workflow from blockwork to final finishes.
Understanding MEP Work in Buildings
Before we can sequence the work, we need to respect what MEP (Mechanical, Electrical, Plumbing) rough-in actually involves. This isn't just about fitting switches and taps at the end; it's about embedding the building’s essential services into its very structure.
MEP installation is the process of laying the hidden network of conduits, pipes, and ducts that make a building functional. This includes:
- Electrical Work: Laying PVC or metal conduits inside walls and slabs for wiring, installing back boxes for switches and sockets, and running lines for lighting and power.
- Plumbing Work: Installing concealed pipes for water supply (hot and cold) and drainage lines within walls and floors. This also includes pipes for fire fighting systems.
- HVAC Systems: Placing ducting for air conditioning, ventilation shafts, and refrigerant piping, much of which is concealed above false ceilings or within dedicated shafts.
This work, often called the “first fix,” happens after the structural frame and masonry are complete. It requires chasing—cutting grooves into walls—to embed these services, making them invisible after finishing.
Understanding the Plastering Process
Plastering is a critical part of the building finishing stages. Its purpose is twofold: to provide a durable, protective layer over masonry and concrete, and to create a perfectly smooth, level surface for paint, tile, or other finishes.
The plastering process is methodical. It involves preparing the surface, applying one or two coats of mortar, and then curing it properly to prevent cracks. Plaster effectively seals the wall.
Once a wall is plastered and cured, it is considered a finished substrate. Any work that requires breaking this surface is rework, plain and simple. It compromises the quality of the finish and introduces unnecessary costs and delays.
The Correct Construction Sequence: MEP First, Plastering Second
The non-negotiable rule on any professionally managed site is that concealed MEP work must be completed before plastering begins. The logic is straightforward: you cannot finish a surface before all the components behind it are in place and tested.
Here is the correct construction sequence to follow:
- Wall Chasing and MEP Marking: Once the blockwork or brickwork is complete, the MEP team marks the routes for all conduits and pipes on the walls and slabs as per the approved drawings. The civil team then cuts the chases (grooves) accordingly.
- MEP First Fix Installation: The electrical and plumbing teams install all their concealed items. This includes electrical conduits, junction boxes, switch boxes, water supply pipes, and drainage lines. Everything that will eventually be hidden by plaster is put in place.
- Inspection and Testing: This is a crucial hold point. Before anything is covered, the site engineer and quality controller must inspect the MEP installation. Electrical conduits should be checked for continuity, and plumbing pipes must undergo pressure testing to ensure there are no leaks.
- Chasing Refill: After the MEP work is approved, the chases are filled with mortar, often with a bonding agent, to make the wall surface whole again.
- Plastering: Only after all concealed MEP work is installed, tested, and the chases are filled can the plastering team begin their work. They now have a clear, prepared surface to apply the final finish without any obstructions.
Following this sequence is essential for project efficiency. It ensures that critical systems like plumbing are verified before they are made inaccessible. Coordinating this requires a robust site management plan, clear communication between teams, and the use of professional construction tools and installation systems to ensure that what goes into the wall is secure and reliable. The goal is to build confidence at every stage, knowing that what you're about to cover up is 100% correct.
Real Examples from Site Execution
The difference between the right and wrong sequence is best illustrated with two common site scenarios.
Scenario 1: The Wrong Sequence (Plastering First)
A project manager, under pressure to show progress, instructs the civil team to start plastering a floor. The walls look clean, and the client is impressed. A week later, the electrical team arrives to lay conduits and finds finished walls. They have no choice but to mark their routes and begin chipping away at the newly cured plaster.
The result is a mess. The plaster is damaged, dust covers everything, and the cost of rework escalates. The patched areas never perfectly match the original finish, leading to quality complaints. The schedule is delayed by over a week as one trade undoes the work of another.
Scenario 2: The Correct Sequence (MEP First)
On a well-managed site, the project planner’s schedule has clear dependencies. The plastering activity for a specific area cannot start until the “MEP First Fix & Inspection” activity is signed off. The MEP team completes their installation, pressure tests are witnessed, and the site engineer gives the green light.
The plastering team moves in and finds all chases filled and surfaces ready. They complete their work efficiently and to a high standard. There is no rework, no conflict between teams, and the project moves smoothly into the next phase of the building finishing stages.
Risks of Doing Plastering Before MEP Installation
Rushing to plaster before completing the MEP rough-in is a decision loaded with risk. It’s a classic example of a short-term gain leading to long-term pain. Understanding should MEP be done before plastering is key to avoiding these pitfalls.
- Guaranteed Rework and Damage: Breaking finished plaster is not a clean process. It creates patches that are difficult to conceal, affecting the final aesthetic quality and potentially leading to client rejection.
- Increased Costs: You end up paying for the same work twice—once for the initial plastering and again for the patching and repair. This includes labor, materials, and the hidden cost of management time spent resolving the issue.
- Critical Schedule Delays: The time lost breaking, re-installing, patching, and allowing for curing can have a domino effect, delaying painters, tilers, and other finishing trades down the line.
- Potential for Concealed Defects: If MEP work is rushed to accommodate premature plastering, critical steps like pressure testing might be skipped. A concealed leak from an untested pipe can cause catastrophic damage later, requiring far more extensive demolition to fix.
Best Practices for Coordination
Preventing sequencing errors in the plastering vs MEP work debate comes down to strong management and clear communication. It’s not about which trade is more important; it’s about a logical workflow.
- Integrated Planning and Scheduling: Your project schedule must have clear dependencies. Use software like Microsoft Project or Primavera to link the start of plastering to the completion and sign-off of MEP rough-in for each area.
- Coordinated MEP Drawings: Before any work begins, ensure all MEP drawings are fully coordinated and overlaid with architectural and structural plans. This minimizes the chance of discovering service clashes on site.
- Daily Team Huddles: The civil foreman, MEP foreman, and site engineer should have a brief meeting each morning. This keeps everyone aligned on which areas are ready for MEP, which are under inspection, and which are cleared for plastering.
- Formal Handover Process: Implement a simple sign-off system. When the MEP team completes an area, they submit a “Request for Inspection.” Once inspected and approved by the engineer, a formal handover note is issued to the civil team, officially releasing the area for plastering.
By treating the construction sequence with the respect it deserves, you transform potential site conflicts into a streamlined, efficient, and professional operation. The rule is simple: services first, finishes last.