Crawl Space Encapsulation: Moisture, Drainage, and Ventilation Decisions
Crawl space encapsulation is a building-system decision, not simply a plastic liner installation. Learn how to diagnose moisture, manage drainage, select insulation, and choose between conditioned and unconditioned designs.
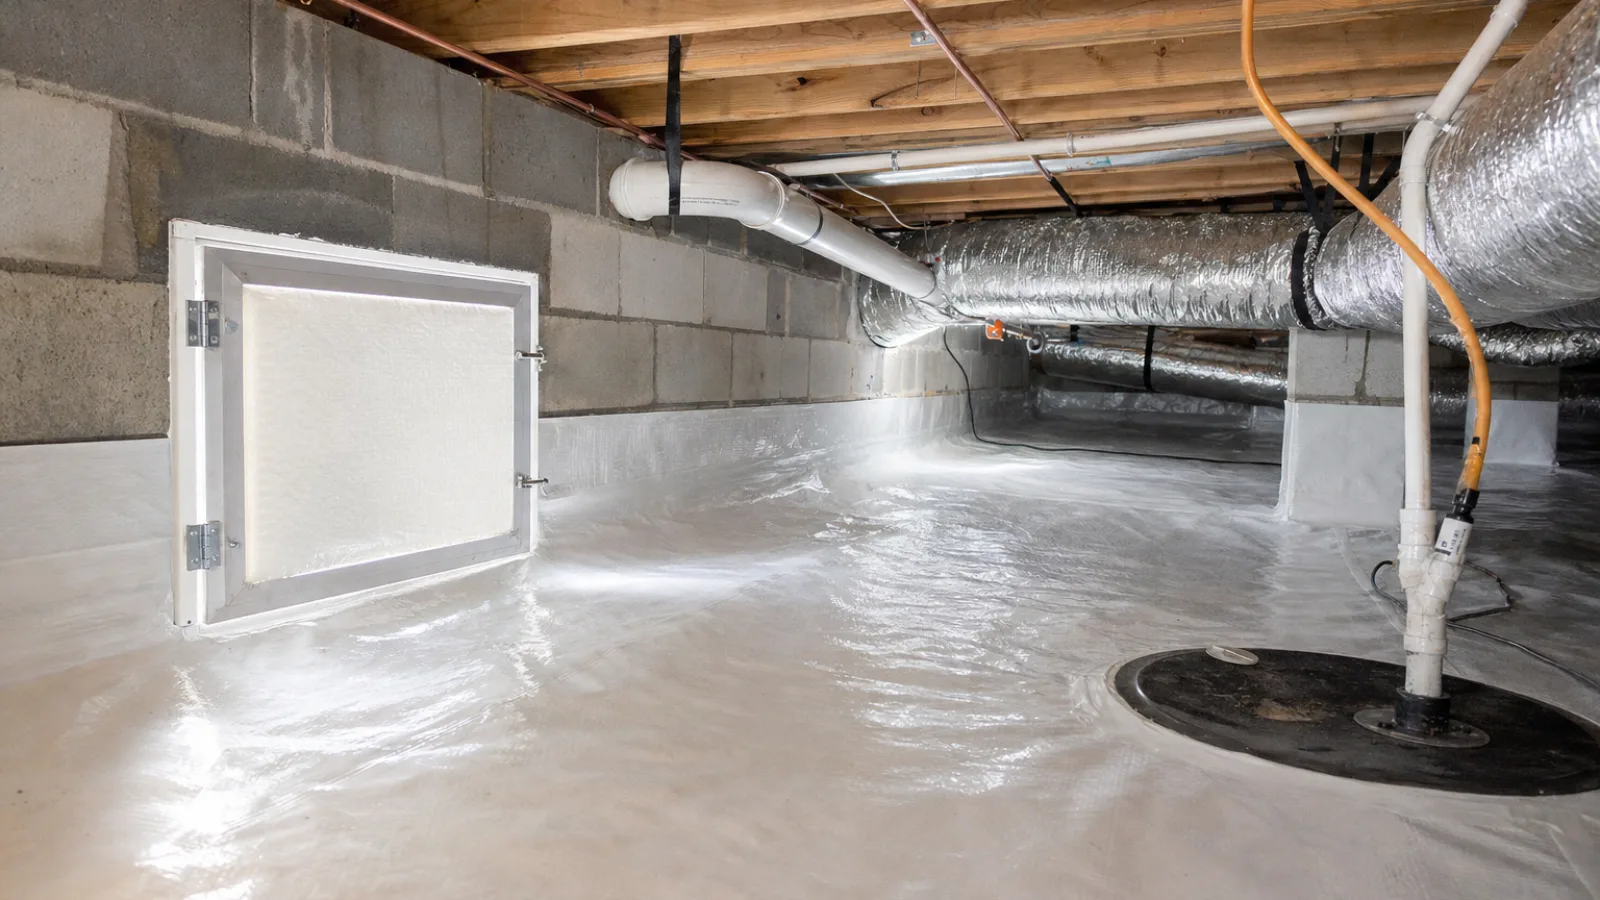
A crawl space can affect floor comfort, indoor humidity, odors, energy use, and the durability of the framing above it. Crawl space encapsulation is one way to control those conditions, but it is not simply a matter of spreading plastic across the soil and closing the vents. A durable result depends on finding the source of moisture, managing bulk water, sealing the enclosure, and choosing an appropriate air and insulation strategy. Homeowners comparing crawl space encapsulation systems should evaluate the complete assembly rather than a single product.
The correct design varies with climate, foundation construction, drainage conditions, local code, combustion appliances, radon potential, and whether the space will be intentionally conditioned. The sequence below provides a practical framework for planning or reviewing the work.
What crawl space encapsulation does
Encapsulation creates a more continuous boundary between the crawl space and the soil, outdoor air, and surrounding foundation. A typical assembly may include a sealed ground vapor barrier, sealed foundation walls and piers, closed or removed vents, an insulated access door, and a method of controlling humidity. Some systems also include drainage improvements, a sump pump, perimeter insulation, or limited mechanical conditioning.
A ground vapor barrier is only one part of that system. It reduces water vapor moving from exposed soil, but it does not stop water entering through foundation walls, plumbing leaks, poor grading, or a high water table. A barrier can also perform poorly when it is torn, left loose around piers, or installed over wet, contaminated, or uneven surfaces without proper preparation.
Start with moisture-source diagnosis
Check bulk water and site drainage
Inspect roof drainage, downspouts, exterior grading, splash blocks, foundation drains, and nearby paving before planning interior work. Water should be directed away from the foundation. Downspouts that discharge beside the wall can overwhelm the soil and create recurring crawl space seepage even after an interior liner is installed.
Look for damp foundation walls, white mineral deposits, muddy areas, erosion channels, standing water, and water marks. Timing matters: moisture appearing after rain suggests a drainage or groundwater pathway, while persistent dampness during dry weather may point to plumbing leaks, condensation, or a high water table.
Identify plumbing, groundwater, and humidity sources
Check supply lines, drainpipes, water heaters, HVAC equipment, condensate lines, and duct insulation. A small plumbing leak can keep the space wet even when exterior drainage is good. In humid climates, warm outdoor air entering through vents can condense on cooler framing, ducts, and pipes. Ventilation alone therefore does not reliably dry every crawl space.
Before sealing, document wood decay, mold-like growth, pest damage, damaged insulation, unsafe wiring, and structural movement. Encapsulation should preserve and improve the enclosure, not hide active defects.
Build the moisture-control system in the right order
Exterior drainage and grading
Repair gutters, extend downspouts, correct negative grading where practical, and address surface water flowing toward the foundation. If the site cannot drain by gravity, a designed drainage system may be needed. Exterior waterproofing or foundation repairs may be appropriate when water enters through cracks, joints, or porous masonry.
Interior drainage and sump equipment
Interior drain tile, a perimeter channel, a sump basin, or a pump can manage water that reaches the crawl space. The design should account for pump capacity, discharge location, backup power, an accessible lid, and safe maintenance access. Sump discharge should not simply return water beside the foundation.
A sump pump controls collected water; it does not replace a vapor barrier or solve every source of seepage. Where groundwater pressure is substantial, drainage, waterproofing, and foundation work may need to be coordinated rather than assigned to one component.
Ground vapor barrier
Remove sharp debris, standing water, and loose contamination before installation. The barrier should cover exposed soil, extend up walls as part of the selected system, and be sealed at seams, edges, piers, posts, and penetrations. Reinforced materials are generally more resistant to punctures from access and maintenance, but thickness cannot compensate for poor detailing.
Do not cover floor drains, cleanouts, inspection points, or equipment controls in a way that prevents service. Required drainage paths must remain functional and accessible.
Wall, pier, seam, and penetration sealing
Air can move through gaps around pipes, conduits, ducts, vents, rim areas, and foundation joints. Sealants and tapes must be compatible with the barrier and substrate. Masonry may require cleaning, drying, and preparation before a sealant will adhere. Piers and irregular corners deserve special attention because they are common bypass points.
Conditioned or unconditioned crawl space?
A sealed crawl space still needs a deliberate strategy for temperature and humidity. Some are connected to the home’s conditioned air or served by a dedicated dehumidifier. Others remain unconditioned but are sealed and managed with a different insulation and humidity approach. The choice should be based on climate, code, equipment, and the building’s air-pressure behavior.
| Decision | Sealed and conditioned | Sealed but unconditioned |
|---|---|---|
| Air movement | Uses approved transfer or mechanical conditioning | Relies on enclosure control and may need separate humidity management |
| Insulation location | Often at foundation walls and rim areas | Depends on local climate and code |
| Humidity management | Provided by HVAC operation, dehumidification, or both | Must be verified; sealed does not automatically mean dry |
| Common risk | Improper pressure balance or oversized conditioning | Stagnant, humid air if no conditioning plan exists |
| Maintenance | Inspect equipment, condensate, filters, and controls | Monitor humidity, drainage, and the enclosure regularly |
Do not connect a crawl space casually to a central HVAC system. Added air volume, return-air paths, filtration, condensate management, and pressure effects should be reviewed by a qualified professional.
Ventilation decisions and air sealing
Older crawl spaces often use foundation vents, but venting is not a universal moisture solution. In warm, humid weather, outdoor air can bring in enough moisture to condense on cooler surfaces. In cold weather, vents can increase the risk of freezing pipes. Open vents also make it difficult to maintain a controlled boundary.
When a design changes from vented to sealed, the vents must be closed and detailed as part of the air barrier, subject to local code. The space may then require approved mechanical conditioning, dehumidification, or another permitted method of humidity control. A sealed space with no humidity plan is incomplete.
Combustion appliances require special care. A furnace, water heater, or boiler may need dedicated combustion air and approved clearances. Never block required openings or use a crawl space as a combustion-air source without professional review.
Insulation, pipes, ducts, and equipment
In a sealed crawl space, insulation is commonly considered at the foundation walls and rim areas so the crawl space becomes closer to the building’s thermal enclosure. In a vented design, insulation is more often located beneath the floor. The correct location depends on the selected moisture strategy, local code, climate, and material condition.
Floor insulation that sags, becomes wet, or blocks inspection can create more problems than it solves. Wall insulation must be compatible with moisture exposure and protected where required. Seal duct joints and repair damaged duct insulation. Keep plumbing, electrical equipment, HVAC components, and shutoffs accessible for inspection and service.
Where pipes are vulnerable to freezing, perimeter insulation alone may not be enough. The design may need to consider heat loss, air leakage, pipe insulation, equipment operation, and backup heating conditions. Vapor-permeable materials may be appropriate in some assemblies, but material selection should follow the wall and moisture design rather than product preference.
Radon, combustion safety, and indoor air quality
Soil gases can enter through cracks, joints, sumps, drains, and utility penetrations. Encapsulation may reduce some entry paths, but it does not guarantee acceptable radon levels. Test the home according to applicable guidance, especially where local geology or building history suggests elevated risk. If levels require mitigation, the system should be designed so the barrier, sump, and vent piping work together.
Because a crawl space can communicate with living areas through floor gaps, duct chases, plumbing openings, and the HVAC system, sealing work can affect indoor air quality. Address sewage contamination, pest waste, significant microbial growth, and deteriorated materials before closing the enclosure. If combustion appliances are present, verify draft and combustion-air requirements after the work.
Access doors and details that determine performance
The access door is part of the enclosure. A suitable door should be durable, properly sized, insulated where required, and fitted with a gasket or compression seal. It should not sit where surface water can enter. The latch must hold the door tightly enough to maintain the intended air seal.
Plan clear routes to the sump pump, plumbing valves, electrical components, HVAC equipment, and inspection areas. Seal penetrations without making future service impossible. Protect the liner from regular foot traffic with walkways or durable access paths, and document the location of buried drainage, cleanouts, and pump components.
Common crawl space encapsulation failures
- Sealing before correcting water entry: The liner hides recurring seepage instead of solving it.
- Using the vapor barrier as a drainage system: Plastic cannot replace a functioning drain or sump design.
- Leaving seams and edges loose: Unsealed joints allow vapor and air movement around the enclosure.
- Ignoring piers and penetrations: Irregular surfaces create major bypass paths.
- Closing vents without a humidity plan: A sealed space can still become damp.
- Installing the wrong insulation: Wet, exposed, or inaccessible insulation may deteriorate quickly.
- Blocking access and equipment: Future inspections and repairs become difficult or unsafe.
- Discharging sump water beside the foundation: This can recycle the original drainage problem.
- Skipping radon and combustion review: Changes to air pathways can create safety concerns.
When to hire a professional
Professional evaluation is appropriate when the crawl space has standing water, recurring seepage, structural deterioration, extensive wood decay, sewage contamination, suspected hazardous materials, unsafe wiring, combustion appliances, or high radon results. A specialist may need to coordinate drainage, structural repair, waterproofing, HVAC, electrical, or indoor-air-quality work.
Ask for a written scope identifying moisture sources, drainage paths, barrier materials, wall and pier details, insulation location, ventilation or conditioning method, sump discharge, access provisions, radon considerations, and maintenance responsibilities. Confirm permits and inspections where required by the local authority.
Crawl space encapsulation FAQ
Is crawl space encapsulation always necessary?
No. A dry, well-drained crawl space may need only routine inspection and targeted repairs. Encapsulation is more appropriate when soil vapor, humidity, recurring moisture, or uncontrolled air movement is affecting the building and the enclosure can be designed correctly.
Should crawl space vents be closed?
Not automatically. Closing vents is normally part of a complete sealed-crawl-space design with moisture control and an approved conditioning or dehumidification strategy. Local code and combustion appliances must be reviewed first.
Can a vapor barrier solve standing water?
No. A vapor barrier reduces water vapor from soil but does not remove bulk water. Standing water requires source diagnosis and may require exterior drainage, interior drainage, a sump pump, waterproofing, or plumbing repair.
Where should crawl space insulation go?
It depends on whether the crawl space is vented, sealed and conditioned, or sealed without direct conditioning. Floor insulation is common in vented designs, while foundation-wall insulation is often considered for sealed designs. Climate, code, moisture exposure, and equipment should guide the decision.
Does encapsulation remove radon?
It may reduce some entry routes, but it does not guarantee safe radon levels. Test after relevant work and install a dedicated mitigation system when testing indicates it is needed.
How should an encapsulated crawl space be maintained?
Inspect the liner, seams, access door, sump pump, discharge, plumbing, humidity, insulation, and equipment periodically and after major storms. Keep service paths clear and repair punctures or leaks promptly.
Conclusion
Effective crawl space encapsulation begins with diagnosis, not plastic. Correct exterior and interior water problems first, install a continuous and serviceable vapor and air barrier, then choose insulation and conditioning details that suit the house and local requirements. Include radon testing, combustion safety, access, sump maintenance, and a documented inspection plan. When the crawl space has complex moisture, structural, or air-quality conditions, coordinated professional design can prevent a sealed enclosure from becoming a concealed problem.