Concrete Pour Planning: Delivery, Weather and Quality Checks
A practical guide to coordinating concrete deliveries, site readiness, weather protection, construction joints, testing and contingency measures before and during a pour.
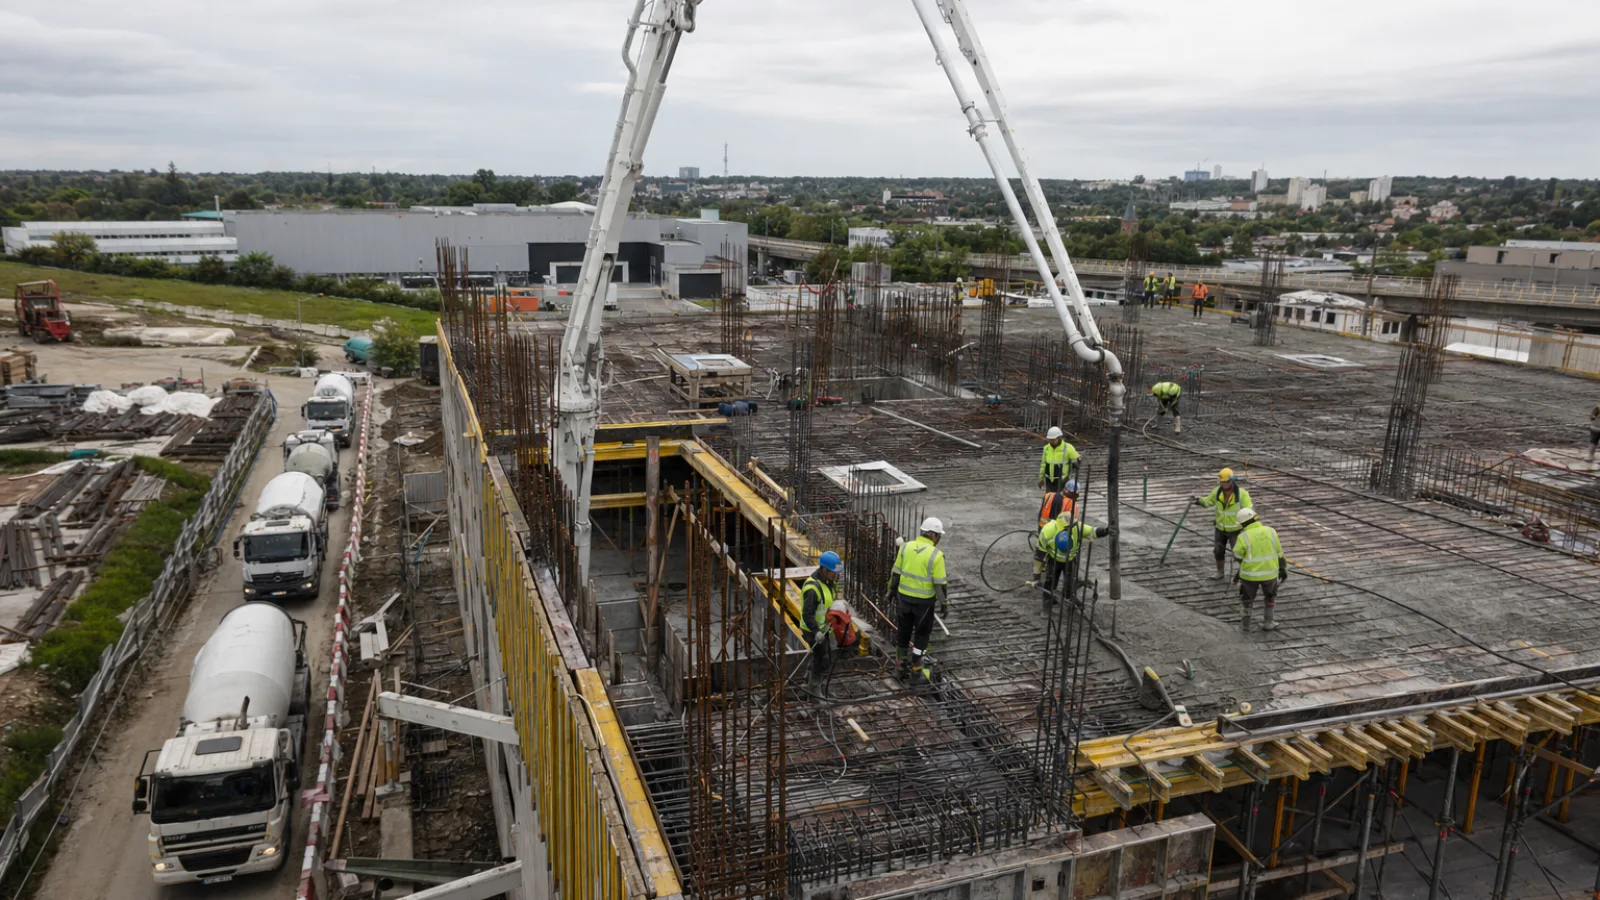
Concrete pour planning turns a high-pressure placement into a controlled sequence of inspections, deliveries, placement activities, finishing and curing. The objective is not simply to order the right volume of concrete. The team must also confirm that the work area is ready, trucks can arrive at the required rate, weather controls are available, testing is organized and everyone knows what to do if the pour is interrupted.
Begin by comparing the approved mix design and project specifications with the planned placement method. Requirements for slump, strength, temperature, admixtures, maximum aggregate size, exposure and curing can affect pump selection and delivery timing. Where temperature or workability is a concern, discuss suitable concrete curing and protection products with the concrete supplier and the project’s responsible engineer rather than making unapproved changes at the site.
Concrete Pour Planning Starts with a Readiness Review
A pre-pour review should be completed early enough to correct problems without delaying the concrete. The exact sign-off process depends on the contract and jurisdiction, but the principle is consistent: do not treat the arrival of the first truck as the final inspection.
Verify forms, reinforcement, embeds and access
Inspect formwork for line, level, dimensions, stability, cleanliness, release agent and adequate support. Check that joints are sealed where required and that forms will not move under the pressure and vibration of fresh concrete. Remove standing water, debris, loose material and anything that could contaminate the placement.
Confirm reinforcement size, spacing, laps, chairs, cover and ties against the drawings. Also inspect anchor bolts, sleeves, conduits, blockouts, waterstops, embeds and other items that will become inaccessible after placement. Photograph critical areas and record approved deviations before concrete arrives.
Access is part of readiness. Confirm that the pump has a stable setup area, outriggers will not overload weak ground, delivery trucks can enter and leave safely, and the discharge route is clear. Provide lighting for early or late work, fall protection, washout controls, communications equipment and a safe route for workers moving around the placement.
Confirm the approved concrete requirements
Review the purchase order and batch information with the supplier. Confirm the mix designation, quantity, delivery window, required placement rate, maximum water-cementitious materials ratio where specified, admixtures and any restrictions on adding water at the site. The supplier should understand the anticipated travel time, discharge conditions, pumping distance and weather forecast.
Estimate the quantity independently from the drawings and include an appropriate allowance for irregular excavation, overbreak, waste and measurement uncertainty. Avoid treating excess concrete as harmless: too much can create disposal and cost problems, while too little can leave a placement incomplete.
Build a Delivery and Placement Sequence
Concrete should arrive at a rate that matches the crew’s ability to place, consolidate, screed, finish and protect it. Trucks that arrive too quickly can create congestion and waiting at the discharge point. Trucks that arrive too slowly can leave unfinished areas, increase the risk of a cold joint and force the crew to work outside the intended sequence.
Calculate the required pour rate
Divide the planned concrete volume by the target placement duration to establish an initial rate. Then test that rate against pump capacity, hose movements, crew size, access, lift thickness, reinforcement congestion and the finishing window. A theoretical pump output is not the same as a reliable site output because repositioning, inspections, truck changes and obstructions reduce productivity.
Break the pour into clearly identified zones or strips. Mark the direction of travel, starting point, lift sequence, screed references, finishing responsibilities and locations of planned joints. The placement supervisor should be able to explain the sequence to every crew member before the first discharge.
Coordinate trucks, pump access and site traffic
Use a delivery schedule with a call-in procedure rather than relying on trucks to arrive at random intervals. The dispatcher, pump operator, site supervisor, testing technician and traffic marshal should have the same contact details and escalation process. Confirm how the supplier will respond if a truck is delayed, rejected or redirected.
| Planning item | What to confirm | Why it matters |
|---|---|---|
| Truck sequence | Order, interval, estimated travel time and dispatch contact | Maintains a consistent flow and limits waiting |
| Pump setup | Ground bearing, reach, hose route, washout and backup access | Reduces movement, obstruction and equipment risk |
| Placement crew | Personnel for discharge, vibration, screeding, finishing and cleanup | Prevents one activity from becoming a bottleneck |
| Testing | Technician arrival, sampling points, specimens and forms | Ensures quality data is collected at the required stages |
| Traffic control | Truck route, spotter, exclusion zones and emergency access | Protects workers and keeps deliveries moving safely |
Before the pour, conduct a short briefing at the actual work area. Explain hand signals, radio channels, truck positioning, emergency stop authority, vibrator use, access restrictions and who can approve a change. A single person should coordinate the placement so instructions do not conflict.
Plan for Temperature, Wind and Rain
Weather planning is more than checking the air temperature. Consider concrete temperature, delivery time, sun exposure, wind speed, humidity, overnight conditions, evaporation and the forecast during curing. The project specification may establish limits or require a formal hot- or cold-weather plan.
Hot-weather controls
Hot conditions can accelerate setting and increase moisture loss from the surface. Plan deliveries for cooler periods where practical, shade forms and reinforcement when appropriate, and prepare curing materials before the first truck arrives. Keep the placement moving without sacrificing consolidation or finishing quality.
Do not add water at the site simply to restore workability. Any adjustment must follow the approved mix requirements and be documented. Coordinate with the supplier about allowable admixtures, aggregate or mixing-water controls and the expected concrete temperature. Watch for rapid surface drying, plastic shrinkage risk and unsafe working conditions.
Cold-weather controls
Cold conditions slow setting and strength development and can damage concrete that freezes before it has gained sufficient strength. Protect the subgrade, forms, reinforcement and placed concrete as required by the specification. Have insulating blankets, enclosures, heaters, temperature monitoring and ventilation controls ready before placement.
Heaters must not create unsafe exhaust exposure or dry the surface unevenly. Record concrete and ambient temperatures at the required intervals and maintain protection for the specified duration. Removing protection too early can produce thermal shock or leave the concrete vulnerable to freezing.
Rain, wind and changing forecasts
Plan where water will drain if rain begins and keep tarpaulins or covers available without allowing them to damage the finished surface. Do not finish rainwater into the concrete. Strong wind can increase evaporation and make pumping, crane operations, access and finishing unsafe, even when the temperature is moderate.
Set a decision time for reviewing the forecast and define who can postpone the pour. A controlled postponement is usually easier to manage than beginning a placement that cannot be protected or finished correctly.
Decide How Joints and Placement Breaks Will Be Managed
Joint locations should be determined before the pour, not improvised when concrete is already setting. Review the structural drawings, architectural requirements, waterproofing details, pour strips, movement requirements and engineer’s instructions.
Planned construction joints
For each planned joint, identify its location, orientation, stopping detail, reinforcement continuity, keyways or waterstops, surface preparation and restart procedure. The joint should be placed where its effect on structural behavior and appearance is acceptable. Mark the location physically so the crew can stop at the intended line.
Before restarting, remove laitance and weak material as specified, clean the surface, inspect reinforcement and embedded items, and apply any bonding or preparation materials required by the approved method. Never assume that a generic construction-joint treatment is suitable for every structural or waterproofed element.
Unplanned interruptions and cold joints
If delivery, pump, power or safety problems interrupt the pour, notify the placement supervisor immediately. Stop in a controlled location if possible, protect the exposed surface and document the time, location, concrete batch information, weather and actions taken. The engineer or responsible authority should determine whether the interruption can be accepted, treated or requires removal and replacement.
Organize Testing, Inspection and Records
Testing should be scheduled as part of the pour, not requested after the concrete has been discharged. Confirm the required tests, frequency, sampling locations, specimen quantity, curing arrangements and reporting process with the quality-control team and specification.
Pre-placement checks
Complete the formwork, reinforcement, embed, access, weather, equipment and safety inspections before approving the first load. Record the pour area, drawing revision, mix designation, planned volume, start time and names of responsible personnel.
Fresh concrete testing
Depending on the project requirements, fresh concrete testing may include temperature, slump or flow, air content, density and sampling for strength specimens. Samples should represent the concrete being placed and should be handled according to the applicable testing method. A test result is useful only when the sample, batch, time, location and technician are properly recorded.
Do not reject or accept a load based on an informal observation alone. If a result falls outside the requirement, follow the project’s nonconformance and disposition procedure. Record any approved adjustment, additional test or engineering decision.
Specimens, curing and documentation
Protect strength specimens from damage, vibration, temperature extremes and premature moisture loss during initial handling. Maintain chain-of-custody information and ensure the laboratory receives the required details. Keep delivery tickets, test reports, temperature logs, weather records, inspection forms, photographs and curing records together with the pour documentation.
Prepare a Concrete Pour Contingency Plan
A contingency plan should identify triggers, decision-makers, equipment and communications. It should not merely say “call for help.” Confirm who can pause the pour, who contacts the supplier, where a controlled stop can occur and how the team will protect unfinished concrete.
Delivery delays
Set a maximum acceptable waiting period based on the approved method and environmental conditions. If trucks are delayed, slow or stop the placement in a planned location rather than spreading concrete into an uncontrolled thin edge. Keep the testing technician and finishing crew informed so work does not continue beyond the available time.
Pump, vibrator or power failure
Identify backup equipment or rental contacts for critical items. A standby vibrator, spare fuel, charged radios, generator provisions, replacement hoses and basic repair tools can reduce the effect of a minor failure. Equipment should be inspected before the pour, and operators should know the safe shutdown procedure.
Weather or safety stoppage
Define where workers can move safely, how concrete will be protected and what temporary drainage or covering is available. If lightning, flooding, high winds, unsafe visibility or another hazard develops, stop work under the site safety procedure. Quality and schedule targets never justify exposing workers to uncontrolled conditions.
Use a Day-of-Pour Checklist
- Approved drawings, mix design, pour plan, permits and inspection sign-offs are available.
- Forms, reinforcement, embeds, waterstops, blockouts and access routes are inspected.
- Concrete quantity, delivery sequence, truck contacts and dispatch intervals are confirmed.
- Pump setup, truck route, traffic control, washout, lighting and exclusion zones are ready.
- Placement, vibration, screeding, finishing, curing and joint responsibilities are assigned.
- Weather controls, covers, insulation, temperature monitoring and rain protection are on site.
- Testing personnel, equipment, sampling materials, specimen molds and forms are prepared.
- Backup equipment, emergency contacts and controlled stopping locations are identified.
- The pre-pour briefing is complete and the person directing the placement is clearly identified.
Frequently Asked Questions
How far in advance should concrete pour planning begin?
Begin when the placement area, mix requirements and approximate volume are known. Confirm the detailed plan several days before the pour, then complete a final readiness and weather review before ordering or dispatching concrete. Complex placements may require earlier coordination with the engineer, supplier, testing agency, traffic team and specialist installers.
What should be checked before the first truck arrives?
Check formwork, reinforcement, embeds, access, pump setup, delivery routes, staffing, weather controls, testing arrangements, curing materials, safety measures and planned joint locations. The concrete order and approved mix requirements should also be confirmed with the supplier.
How do you sequence ready-mix trucks?
Set an arrival interval based on the required placement rate, travel time, discharge time, pump capacity and crew productivity. Use a dispatcher contact and call-in process so the sequence can be adjusted when traffic, weather or site conditions change.
When should a concrete pour be postponed?
Postpone when the work area is not ready, required inspections are incomplete, the forecast exceeds project limits, safe access cannot be maintained, testing cannot be arranged or critical equipment and backup measures are unavailable. The responsible engineer, superintendent or contract authority should make the decision under the project procedure.
What records should be retained after a pour?
Retain delivery tickets, batch information, test results, specimen records, inspection approvals, weather and temperature logs, curing records, photographs, joint details, nonconformance reports and any approved changes or engineering decisions.
Conclusion
Effective concrete pour planning connects design requirements with site execution. Confirm readiness before delivery, match the truck sequence to the crew and pump, prepare for weather, define joints in advance, organize testing and establish clear responses to interruptions. When the team knows the intended sequence and fallback actions, the placement is more likely to remain safe, traceable and consistent with the project requirements.